Preparing for 2013 Ironman Coeur d’Alene (Race Day Start)

Ironman Coeur d’Alene is fast approaching.  Only 11 weeks away!

Race day is Sunday, 23 June.  The last two times I did this race, the weather was perfect for racing.  Last year was a bit tenuous though, as there were nasty storms in the area, and lots of rain during the night.  The sun rises around 5 am, so you will be able to see without headlamps when you arrive.  Now is the time to get into transition and fill your water bottles as well as make any changes to gear in the gear bags that you checked in the day before.

As usual, only competitors are allowed in the transition area.  It gets a bit congested at the entrance to transition, so have the family stand back so everyone can get in and out.

Parking on race day is going to be a bit different than on prior days as they start to close off the streets early.  Last year the race course changed, so we could not go the normal route (Northwest Blvd exit off I-90).  The best bet is to take I-90 to the 4th Street exit.  Head south on 4th street until you are almost downtown (they close 4th before Sherman) and then drive over to 2nd or 3rd Street and park there, North of Sherman.  This is especially good for spectators/family that won’t be there the whole day.  They will be able to leave without getting stuck by race closures.

You will be wearing a wetsuit as the temperature of the lake is in the 50s (F) on race day.  There is plenty of space in the City Park and near the beach to get ready.  There are also permanent restrooms near the North end of the park, but they might not be open yet when you first arrive.  The restrooms next to the beach are always closed (they do have porta-potties).

Prepare yourself for a lot of people as it gets quite crowded with spectators at the beach.  When the beach opens up for competitors, there will be a small opening that you have to go through to cross a timing mat.

You are all set now.  You’ve trained for weeks on end and when the horn sounds, it’s everybody into the water!  Have a great race!

Next article on preparing for Ironman Coeur d’Alene>>

Tagged with: , , , , , , , , , ,
Posted in Ironman, Training, Triathlon

Preparing for 2013 Ironman Coeur d’Alene (Checkin)

Athlete check in for Ironman Coeur d’Alene usually begins on Thursday.  You will have a chance to check in on Thursday or Friday.  I usually check in on Friday.  The check in tent is located at the transition area in beautiful City Park.  Take this opportunity to find some nice IM CDA items for sale.  The volunteers here do an excellent job of checking in athletes and you will be delighted with the speed at which you’re done.

Parking is available all around the park.  You can usually snag a spot directly across the street from City Park at the baseball field.  From there it’s just a short walk to the check in tent.  There’s also parking available at the nearby North Idaho College.  It’s a longer walk, but you can take in the spectacular view of Lake Coeur d’Alene.

Saturday is traditionally the mandatory bike and gear bag check in.  Last year, they started taking pictures of everyone’s bike upon entering transition.  There might have been issues in the past with people taking the wrong bike, etc., so they want to make sure there will be no issues later on.  The gear bags go right next to the bike area and closest to the lake.  It should be noted that you cannot put your bike shoes on the pedals – they must be in the bike gear bag.  You will have a chance on Sunday morning to fill water bottles and adjust bike computers, etc., as well as add items to your gear bags if necessary.  The bags will be outside overnight, and it does rain sometimes, so just be sure to have the opening of the bags tucked underneath to keep them resistant to any rain.

That’s all there is to the check in process for Ironman Coeur d’Alene!  It may seem daunting at first, but you will find that it’s relatively painless.

Next article on preparing for Ironman Coeur d’Alene>>

Tagged with: , , , , ,
Posted in Ironman, Training, Triathlon

Altus Weighted Gloves Review

For two years now, I have been using these Bowflex SelectTech weights.  I love the versatility of the weights, but one downside is that the weights increment by as much as 5 pounds.  For example, I use 25 pounds when performing bicep curls.  The next weight is 30 pounds.  This is a 5 pound increment, and is way too much for me, being the weakling that I am.  Then it dawned on me, that it would be nice if I had some weighted gloves, so I could add 1-2 pounds without having to increment the Bowflex weights.

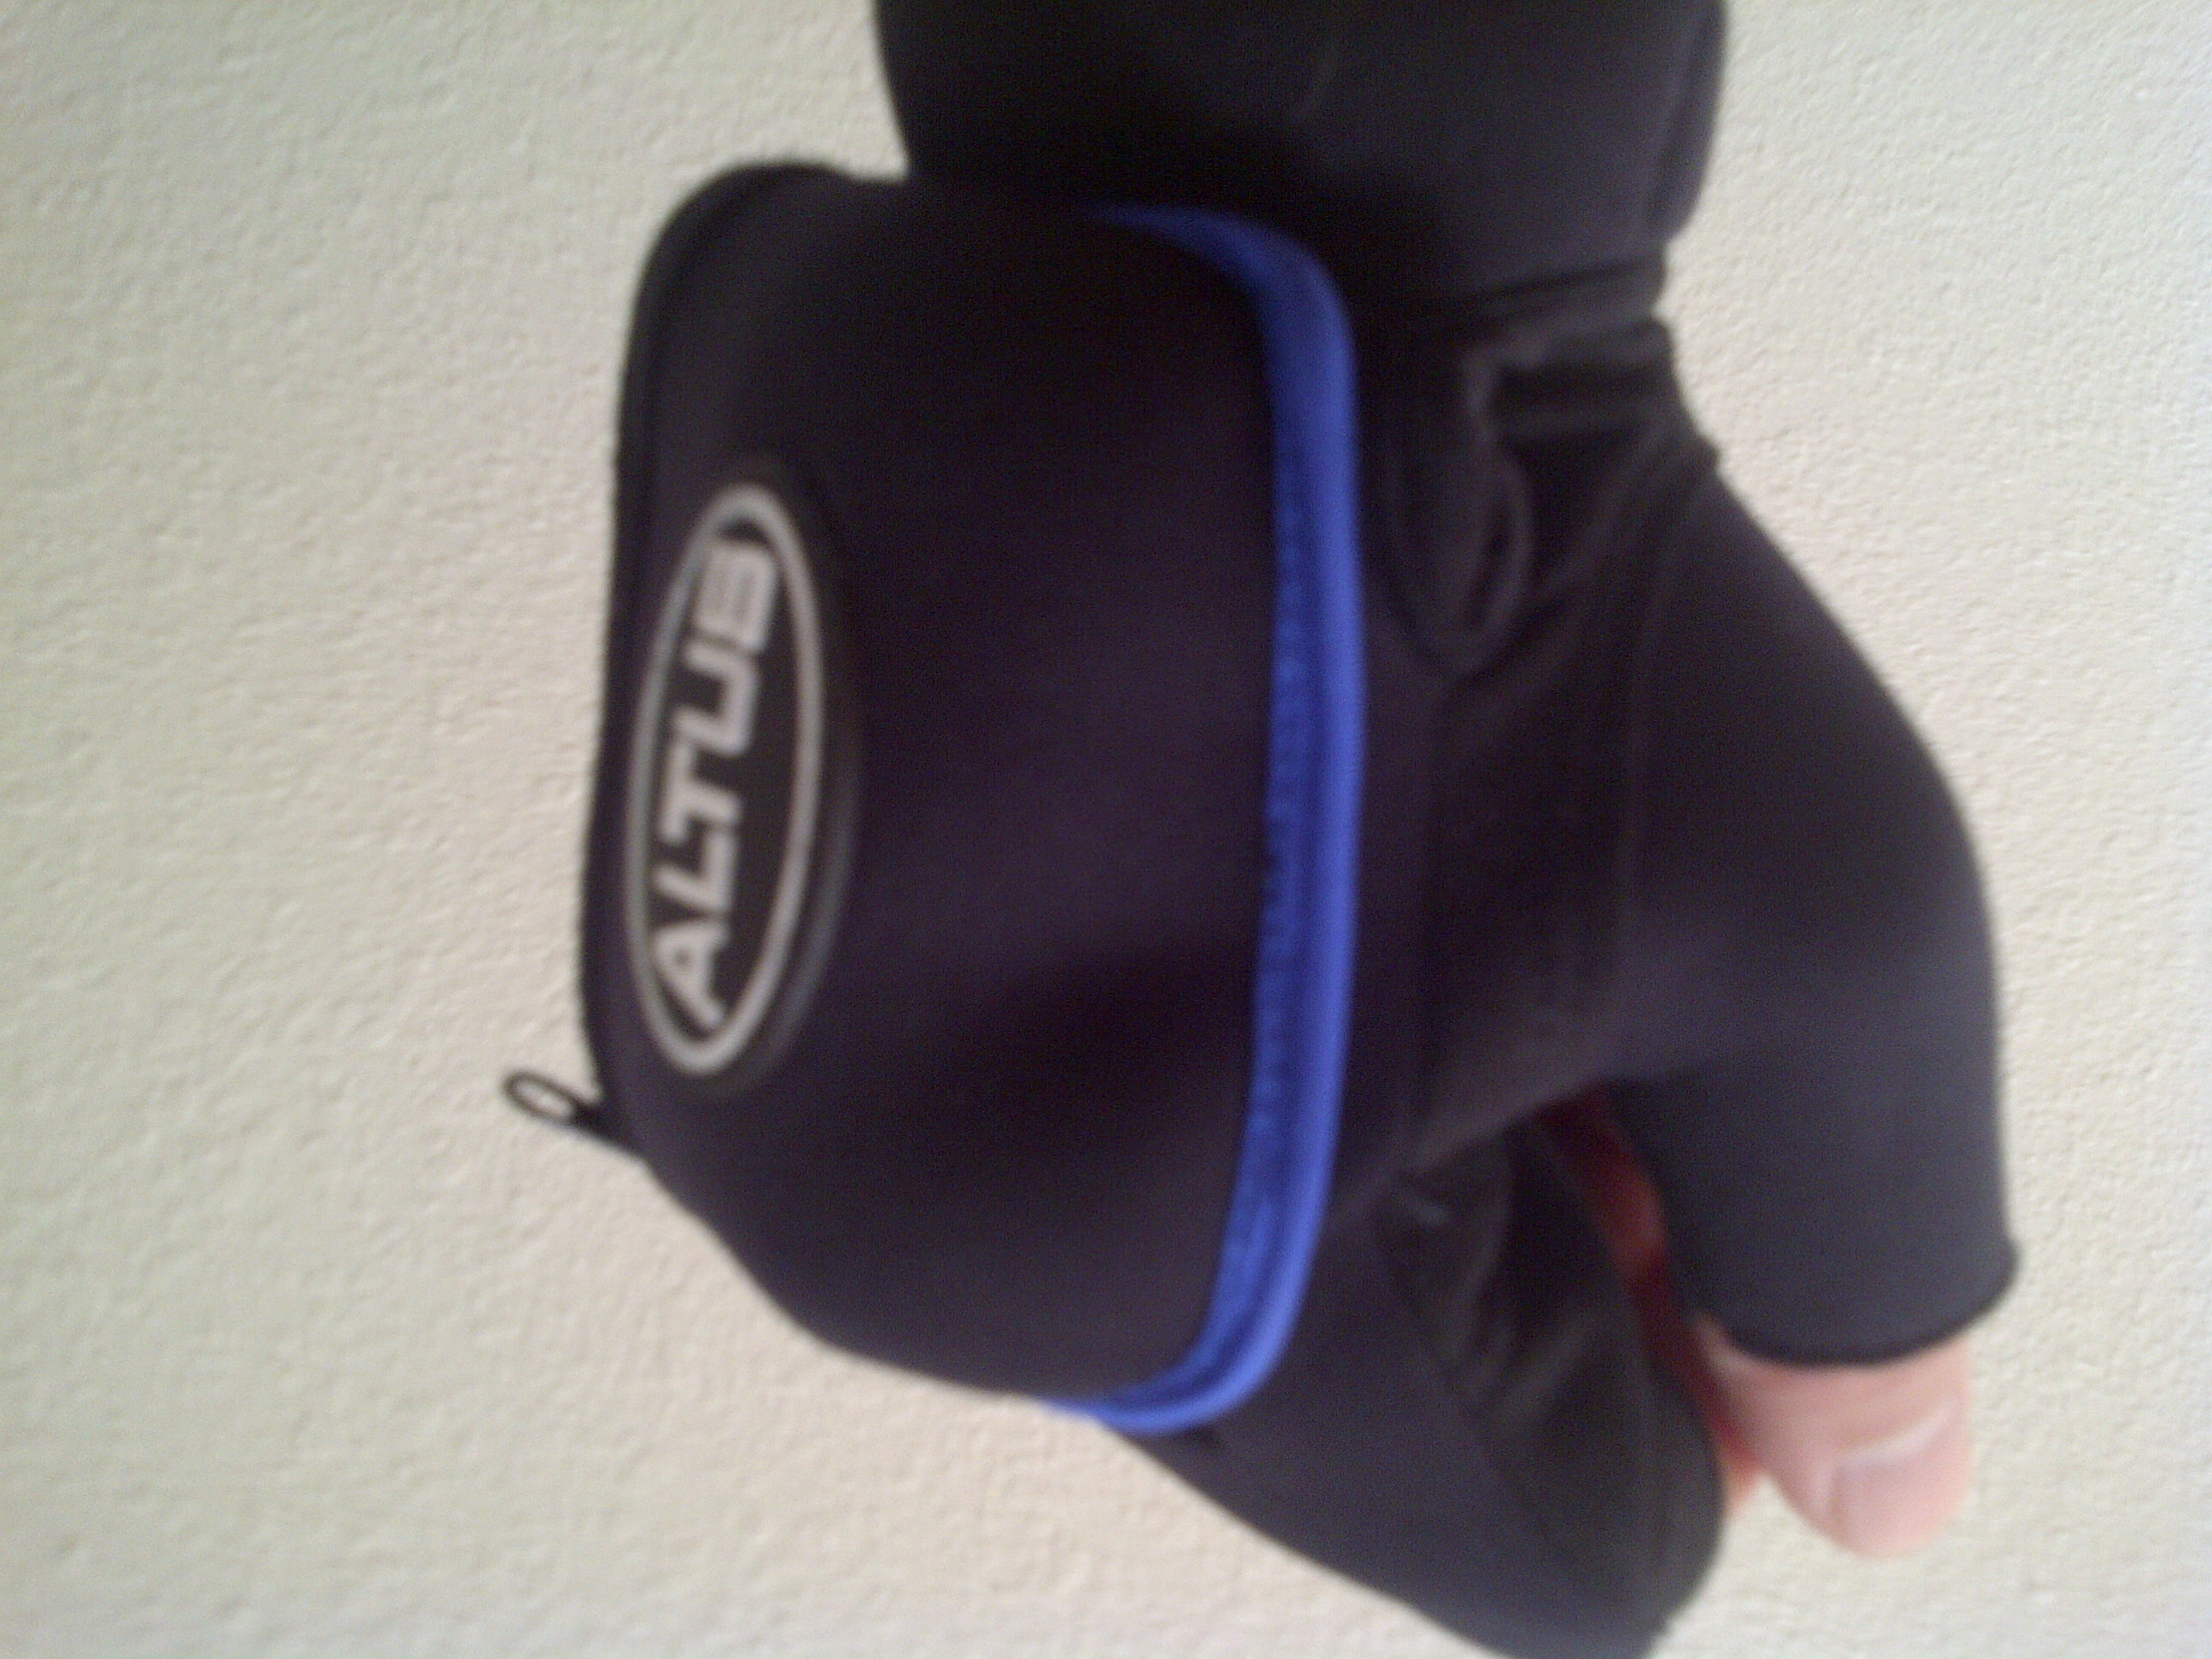
Enter the Altus weighted gloves!  These are like any other weight lifting gloves (I actually used my cycling gloves before), but they have a nice little zippered pocket on the back of the glove.  The gloves each come with four 1/2 pound bean bags that fit nicely into the pocket.  So now I can add up to 2 pounds to each hand, in 1/2 pound increments!

So far the gloves have worked out nicely.  The only issue I have with them is that when using less than 3 bean bags in each pocket, the other ones move around a bit.  Maybe if they came with some kind of spacer or if I pack some bubble wrap in there to prevent the shifting, they would be great!

I realize that for some people, 1-2 pounds may seem like a too small increment, but as I said, I am not that strong (yet!).  The other nice thing about these gloves is that they can be used for shadow boxing or really any activity.  I may try using them while running.

The price was about US $20 and I see no real downside to them yet.  Below is a picture of the glove.
Altus Weighted GlovesAltus Weighted Glove

Tagged with: , , , ,
Posted in Reviews, Training

Preparing for 2013 Ironman Coeur d’Alene (Training)

If you’re participating in the 2013 Ironman Coeur d’Alene, then you have about 12 weeks left before the race. By now you should have put in about 18 weeks worth of swimming, biking, and running. Maybe you even did some strength training too!
This will be my third Ironman race, with the first two being at Coeur d’Alene as well. My focus this year has been on losing weight and strengthening my legs to get ready for the hills of Idaho.
If you live in a flat world like I do here in Florida, then you need to do everything you can to prepare for the hills. The elevation is not too bad at approximately 2300 feet above sea level, and the temperature is usually mild (60-72F) on race day, but hills are the nemesis.
Try hitting the gym and doing step-ups or hack squats to work on leg strength. If you have an indoor trainer, then you can also try working out in a big gear with the front of the bike raised. I personally don’t find this a good simulation of going up the hills because I was always spinning in my easiest gear to get up the mountain. The biggest hill is about 3 miles long, so if you have trained for that, then you will be ready! Just keep on training and remember that you can do it.

Next article on preparing for Ironman Coeur d’Alene>>

Tagged with: , , , , , , ,
Posted in Ironman, Training, Triathlon

2012 (and later) Ironman Coeur d’Alene Bike Course GPX Data

The bike course changed in 2012 for Ironman CDA. This post has a link to the GPX file that I created from my Garmin data. You can use Google Earth or other gpx viewers to open it.

For me, the hardest part about this course were the mountains.  The climbs are 2-3 miles in length and up to 3% grade.  I realized that for many, this is easy, but for us Florida flat-landers, not so much!

Despite the climbs, I am looking forward to doing IM CDA again this year!

Tagged with: , , , , , , , , ,
Posted in Triathlon

Using Presta Valve Extenders

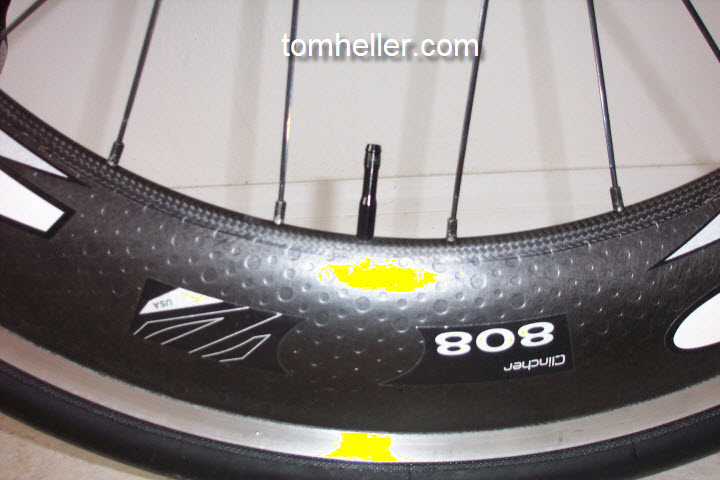
I recently purchased a Zipp 808 rear wheel with a CycleOps Power Meter.  One of the first things I found out was that the presta valves on my inner tube would not be long enough to pass through the rim of the 808.  Zipp sells presta valve extenders just for this purpose.  The extender is basically a long steel tube.  One on end are threads that thread onto the presta valve.  On the other end is a nipple of sorts, onto which you put your pump.  The first thing you have to do is open the presta valve by unscrewing it as if you were going to pump it up.  The next step is to wrap teflon tape (sometimes called plumber’s tape) around the threads of the presta valve.  Next, you screw the extender onto the wrapped threads.  The presta valve remains open all the time.  I was a bit confused as to how this would really work, but in the end, I realized that the presta vale shouldn’t leak because there is no downward pressure on the valve core.  When inlfating, the air pressure from the pump is enough, as usual, to open the valve and let the air into the tube.  Zipp recommends putting presta valve extenders on all of your spare tubes as well.

So, now I have my tube and extender, and I put the tube into the tire and inflated the tube using my pump.  It was weird placing the pump over the end of the extender because I guess there is no concept of a valve core at the end of the extender.  It works great, it’s just visually confusing to me.

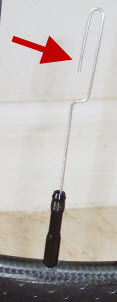
Now here comes the really bizarre part.  Because there is no valve core on the extender, how the heck do I deflate the tire?  Well, I came up with my own solution, which was to open up a paper clip until it was long enough to slide down into the extender until it pushed the valve core open on the presta valve.  Low tech at its best.  Zipp does not really give you any instructions on deflating the tube with extender in place.

Overall, I haven’t really had any problems using the extenders or pumping up the tire with the extender on it.  I did have an issue where the tube almost completely deflated on its own during a trip to Miami.  The bike was on the car rack and it wasn’t particularly hot or anything, but I did discover that the extender had partially unthreaded itself.  My guess is that the vibration of the drive loosened it and maybe caused the presta valve core to open as well.  The tube was fine and pumping it back up fixed the problem.

Topeak also makes valve extenders, but theirs have an inner core that allows you to open and close the Presta valve core.  I now use the Topeak valve extender.  Sometimes it is a pain to get the core opened as the extender core is not always engaged with the presta valve core, but this extender allows me to deflate the tube without using the paper clip, not that I really ever want to deflate it.

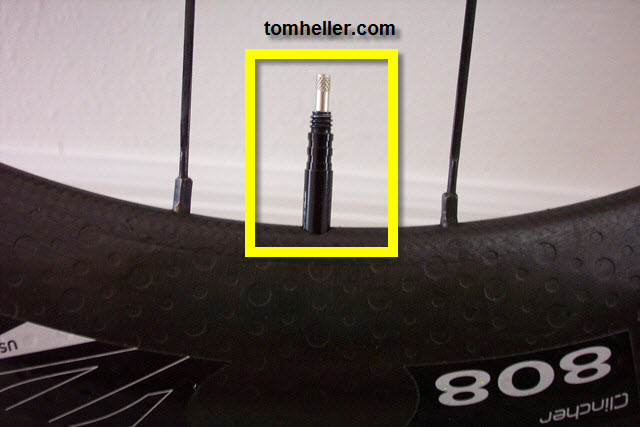
Here is a picture of my wheel with the valve extender in place.

Presta Valve Extender

Presta Valve Extender

And here is the extender with my “deflation tool” in place, ready to deflate the tube.

deflation tool

Deflating using a paper clip

This is a picture of the Topeak extender that I now use.

Topeak Prest Valve Extender

Topeak Extender


Tagged with: , , , , , , , , , , , ,
Posted in Introductory, Presta Valve, Reviews, Triathlon

Ironman Coeur d’Alene 2012 Race Recap

Approximately 2,310 athletes started this race, but only 2,144 would finish, and Sean Murphy, 44, of Seattle, WA would be pulled from the swim.  He died two days later.

I finished 2125 out of 2144 finishers in 16 hours, 51 minutes and 59 seconds, almost one hour longer than last year.

The start of the race day saw beautiful weather.  After a night of major thunderstorms and rain, the temperature at 7 a.m. was about 55F, with partly cloudy skies.  The high temp never got above 80F, that I could tell from the thermometer at a local CDA bank.

As the pro athletes started their second lap in the near 59F water of Lake Coeur d’Alene, the age groupers set off for the 2.4 mile swim.  As always with the mass start, there are so many athletes in the water, that it’s nearly impossible to swim, at least with any kind of form that matches the hours of training.  Wetsuits make it that much more difficult to use an efficient stroke.  By the second lap, there were 2-3 foot waves caused by boats and steady winds.  In the end, I finished my swim in 1:47:59.  This was much slower than my anticipated time of 1:30:00.

Out of the water and into transition, the volunteers struggled to peel the wetsuits off of the athletes.  From there, it was time to pick up the bike gear bag and head into the changing tent.  For me, it is just a matter of putting on bike shoes, arm warmers/sun sleeves, helmet, sunglasses, and gloves.  Exiting the changing tent, volunteers waited to slather sunscreen on our bodies to protect us from the hours of sun that were yet to come.  Total transition time 14 minutes 11 seconds.

My bike time last year in this race was 7:07:25, which is about 30 minutes slower than my usual time riding on the flats of Florida.  This year my time would end up at 7:49:12.  The bike course had changed from the previous years.  Instead of navigating the hilly, curvy roads of Hayden Lake, the course instead took us South on highway 95.  The new portion of the course included a 3 mile climb at 5% grade, and two, 2 mile climbs at 3% grade.  For a Florida guy like myself, this seemed quite daunting.  I managed to spin my way up these hills (multiple times because the course was two, 56-mile loops), but it really cut into my overall time.  There were also four pit stops, with one taking nearly 8 minutes due to the line of athletes.  Below are screen shots from my Garmin showing the map and the elevation/grade.

Elevation and grade graph

Garmin results showing elevation and grade
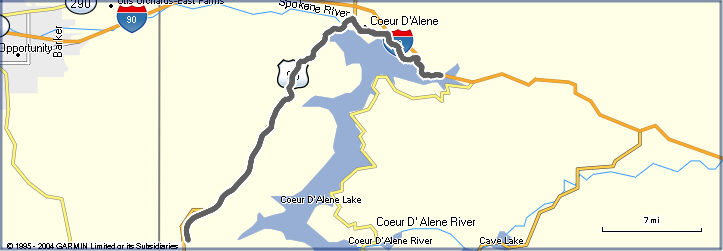
Ironman Coeur d'Alene Bike Route

Ironman Coeur d'Alene Bike Route

Finally finished with the bike, I transitioned back into the changing tent, exchanging bike shoes for running shoes, removing helmet and gloves, and then heading out for more sunscreen.  Can I just say, the volunteers at this race are awesome!  T2 time was 7 minutes, 29 seconds.

Onto the run.  I managed to run an entire 1/2 mile before I had to start walking.  I already had two large blisters – one on the bottom of each foot, just as last year.  The friction from my bike shoes was still a problem despite efforts to prevent it.  Between the blisters and the urge to have a bowel movement every time I started running, it didn’t seem like I would be doing anything more than walking.  And so, I walked, as fast as I could, for the remaining 25 miles.  By the end of the first lap (13 miles), and coming through downtown, I was ready to give up and end my day.  In the end, I decided to just keep going.  I would either finish after midnight, fall over dead, or finish with a time that I would be unhappy with, but still be an ironman.  Near mile, 16 of the run, I encountered another athlete who was in a similar situation as myself, but this was his first Ironman race.  We were determined to stick it out and walked briskly all the way to the finish.

Hobbling down the finish chute in downtown Coeur d’Alene, the hundreds of spectators high fiving gave me a final boost of adrenaline and I actually ran the last 20 yards to the finish.

So, another Ironman race in the books.  No way would I sign up for next year’s race.  Not after that day.  But, in the end, I couldn’t help myself.  I did sign up for 2013 after all.  If not for myself, then for the memory of athletes like Sean Murphy, who tried and died or Cathy Stephens, who finished 23 seconds after midnight.

Tom Heller, you are an Ironman!
Posted in Uncategorized

Ironman Florida 70.3 Recap

It was a beautiful day in Haines City, Florida this past weekend and the first time the city hosted this event. The overall event turned out geat! The city and especially the volunteers did a great job. I would definitely go back next year. The event was won by Lance Armstrong in approximately 3 hours 45 mins.

Swim: The swim took place in Lake Eva. 1.2 miles in what turned out to be a M or W (depending on your point of view) shaped course. I did not enjoy this part as the total of six turns caused a lot of clobbering as the athletes converged on each buoy. My time was 50 minutes plus a few seconds.

Bike: A beautiful ride through the rolling hills of Polk County. As it turned out, this 56 mile course had lots of hills! Even still I managed a time of 3 hours 6 minutes.

Run: By the time the run started for me, it was well over 80F. The run consisted of three laps around the lake and neighborhood. This course also had hills at the start of the course. I ended up doing a run/walk method in order to complete it.

My total time including roughly 7 minutes for each transition was 6:51:00.

Tagged with: , , ,
Posted in Ironman, Reviews, Triathlon

First Triathlon of 2012

This Sunday, 1 April, I will participate in the Nautica South Beach Triathlon – International Distance race.  This will be my fourth start in the race – my third international distance race.  I love the triathlon the most.  The venue – Miami South Beach – is awesome at this time of year.  The water temp is usually just under legal.  There are hills – causeways – that make the bike a bit challenging.  The run is an out and back along South Beach paved trails and boardwalks.

For me the interesting part will be how I will make out.  I have not done any training in the last three weeks due to travel and a nasty cold.  The cold should be gone by Sunday, but it only takes two weeks to become detrained, so we shall see.

Tagged with: , , , , , , ,
Posted in Training, Triathlon

How Fast Can You Go (in any given gear)?

If you are like me, then the gear you choose while racing in a triathlon is going to be the one that allows you to a) pedal fast, and b) go fast!  Why pedal fast?  It’s usually easier to go up hills or flat out if you can spin vs. mashing the pedals, though I have seen athletes doing just this even when going up hill.  Why go fast?  That’s the whole point of racing!

So, just how fast can you go in a given gear?  This is usually something that any athlete with a GPS or bike computer will know with experience, but it is an easily calculated number, if you know the formula.

First, let me talk about gear inches.   Take the number of teeth on the chain ring and divide it by the number of teeth on the cog, then multiply this ratio by the diameter of your wheel (in inches) to arrive at the result.  For example, if you have a Cervelo P2 like me, then you probably have a compact chainring – 50 teeth on the big ring, and 34 on the small ring.  You may also have a typical cassette with 12 teeth on the smallest cog and 25 on the biggest.  So, if you were using the large chainring and the smallest cog, the calculation would be (50 / 12) * 27 = 112.50 inches.  This is nice to know, but doesn’t really tell us much.

Gear development on the other hand, is the distance that your bike will travel with one revolution of the pedals.  This is much more helpful because we can use it to work out the miles per hour for a given gear inch value.  To calculate gear development, simply take the gear inches number and multiply it by Pi (approx. 3.1415).

Using these values, one can easily calculate speed in mph for any chain ring/cog combination.  The easy formula then is Gear Development * rpm * 0.0114.  Using the same chain ring/cog combination from above (50/12), we find that we will go 30.22 mph at 90 revolutions per minute (rpm).

Of course, the hard part is actually pedaling 90 rpm when using this gear combo.  You still need the leg strength to overcome the downward force of your weight.  The variable in this calculation is always going to be how many rpm you can pedal.

Here is a list of speeds (mph) based on a 50 tooth chainring, traveling at 90 rpm (the number in parens is the cog size):

(12) 30.22

(13) 27.89

(14) 25.90

(15) 24.17

(16) 22.66

(17) 21.33

(19) 19.08

(21) 17.27

(23) 15.77

(25) 14.50

Tagged with: , , , , , , , , ,
Posted in Introductory, Ironman, Training, Triathlon